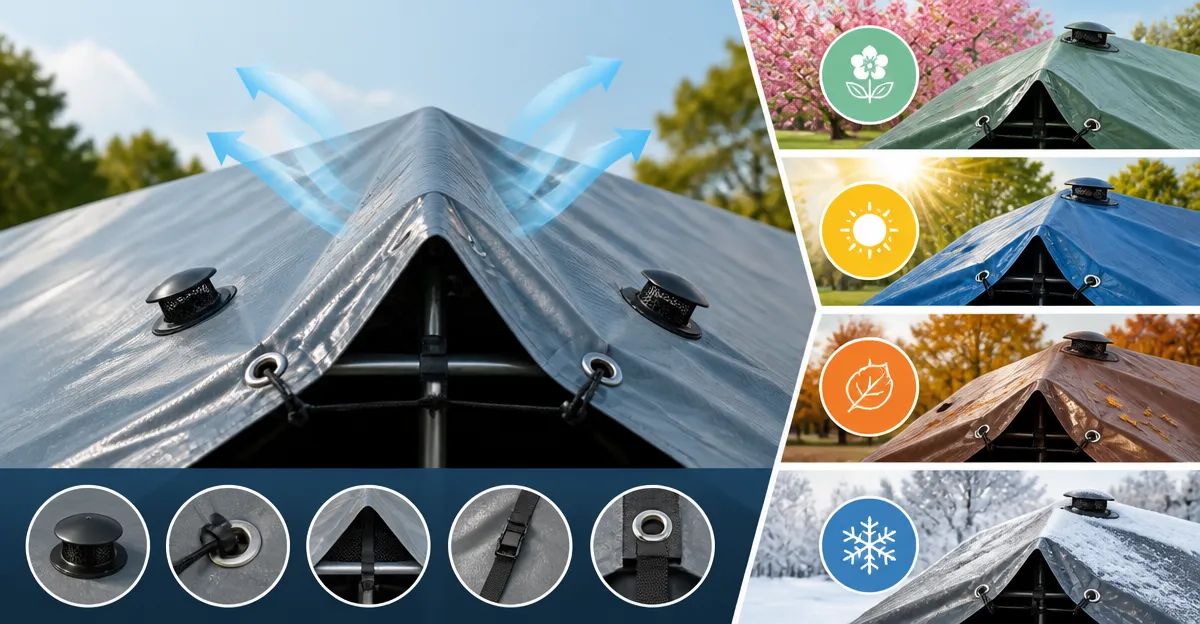
How to Vent Tarps for Every Season: Step-by-Step Strategies to Prevent Condensation, Mold, and Heat Build Up
This guide explains how to manage ventilation for tarps across spring, summer, autumn, and winter. It demonstrates why proper airflow prevents condensation, mold growth, and excessive heat. Readers will learn practical techniques that work with a variety of tarp materials. The information is useful for gardeners, campers, and anyone who uses tarps for shelter.
What You Will Need
- Shade cloth or mesh tarp appropriate for the season (see product recommendations below)
- Sturdy grommet‑compatible rope, bungee cords, or zip ties
- Ground stakes or anchor brackets
- Measuring tape and marker
- Utility knife or scissors
- Weather‑proof sealant for seams if required
All of these items are commonly available at hardware stores or online. Selecting the right tarp reduces the need for additional accessories. The list is intentionally concise to keep the project affordable. Each item will be referenced when a specific step calls for it.
Step 1: Assess the Environment and Seasonal Requirements
The first step is to evaluate the climate conditions of the location where the tarp will be used. In summer, the primary concern is heat build up and ultraviolet exposure; in winter, condensation and frost become critical. Identify whether the area receives full sun, partial shade, or frequent rain. Understanding these variables guides the selection of a tarp with the correct shade rate and material thickness.
For hot summer months, a 70% shade cloth such as the winemana Shade Cloth offers an optimal balance between sunlight blockage and airflow. It blocks seventy percent of direct sun while allowing thirty percent to pass, reducing temperature without creating a humid micro‑climate. The high density polyethylene construction provides durability and breathability, essential for preventing heat accumulation. Its reinforced edges and grommets simplify installation on a rectangular frame.
During rainy seasons, a heavy‑duty waterproof tarp such as the GUARD SHIELD Heavy Duty Tarp protects against water intrusion while still permitting ventilation through strategic openings. The 20 mil thickness and rust‑proof brass grommets ensure long‑term performance under harsh weather. This tarp is especially suitable for covering equipment, vehicle bays, or outdoor storage where water pooling is a concern. Its heat‑sealed seams prevent leaks that could otherwise cause internal condensation.
Step 2: Choose the Correct Tarp Based on Shade Rate and Material
Select a tarp whose shade percentage matches the desired level of sunlight reduction. A 60‑70% mesh tarp like the Cool Area Mesh Shade Tarp provides open‑weave airflow while still offering modest shading. The open‑weave design is ideal for insect barriers and for locations where visibility is important, such as patio enclosures. Its HDPE fabric resists UV degradation for up to five years, ensuring a long service life.
If budget constraints are paramount, the Mklsit Shade Cloth delivers comparable performance at a lower price point. Priced at twenty‑one ninety‑nine dollars, it features copper grommets that resist deformation, and a lock‑stitch taped edge that prevents fraying. The product holds a rating of four point five stars from two hundred twenty‑four reviews, indicating reliable quality. Its lightweight yet durable HDPE fabric makes it suitable for garden beds, livestock housing, and temporary car shade.
For general purpose camping or emergency shelter, the Amazon Basics Camping Tarp offers waterproof protection at a very affordable price. At twelve seventy‑four dollars it is the most economical option, yet it includes reinforced corners and rip‑stop technology that prevent tears from spreading. Its dark green color blends with natural surroundings, and the rating of four point six stars from thirteen thousand seven hundred fifteen reviews confirms user satisfaction. This tarp is best used as an under‑layer beneath a shade cloth to combine water resistance with airflow.
Step 3: Measure, Cut, and Prepare the Tarp
Accurate measurement prevents gaps that could trap moisture. Use a measuring tape to determine the exact dimensions of the area to be covered, then add an extra ten percent to allow for overlap. Mark the cut lines with a marker and cut the tarp with a utility knife, ensuring straight edges. If the tarp does not have pre‑cut grommets at the corners, install reinforced grommets using a grommet kit to provide secure tie‑down points.
When working with the winemana Shade Cloth, note that the fabric is stretchy; therefore, the side length may vary slightly from manual measurement. The constant area, however, remains reliable for coverage calculations. The lock‑stitch knitting technology prevents unraveling during cutting, which reduces waste. After cutting, inspect the edges for fraying and reinforce them with a tape seam if necessary.
For the GUARD SHIELD Heavy Duty Tarp, the 20 mil thickness makes cutting more laborious; a sharp utility knife with a fresh blade is recommended. The heat‑sealed seams should remain intact, but verify that no cuts intersect a seam, as this could compromise waterproofing. Reinforce any newly created edges with heavy‑duty duct tape to maintain water resistance. The brass grommets spaced every eighteen inches provide ample attachment points for securing the tarp in windy conditions.
Step 4: Install Ventilation Channels and Overlap Techniques
Proper ventilation requires creating intentional gaps that allow air to circulate while still shielding against direct sunlight or rain. One effective method is to overlap two tarps by thirty percent, leaving a narrow vent strip at the top edge. Secure the lower tarp first, then drape the upper shade cloth so that its grommets align with the lower tarp’s grommets, creating a staggered pattern.
When using the Cool Area Mesh Shade Tarp, its open‑weave structure already permits airflow; however, adding a secondary waterproof layer such as the Amazon Basics Camping Tarp underneath enhances protection from rain. Secure the inner tarp with ground stakes and then attach the mesh tarp using bungee cords through the aluminum buckles spaced every twenty inches. This configuration allows hot air to escape while preventing water from seeping through the mesh.
For the Mklsit Shade Cloth, install corner copper grommets with rope loops to create tension that lifts the tarp slightly off the ground. This elevation creates a convection channel where cooler air can enter from the bottom and warm air can exit from the top. The combination of breathable fabric and raised installation reduces the likelihood of mold forming on the underside.
Step 5: Secure Edges and Anchor Points
Anchoring the tarp firmly prevents wind‑induced flutter that can create pockets of trapped moisture. Drive ground stakes into the soil at each grommet location, ensuring they are angled outward for maximum holding power. For larger installations, use metal anchor brackets attached to a wooden frame for added rigidity.
The GUARD SHIELD Heavy Duty Tarp includes rust‑proof brass grommets every eighteen inches, making it easy to attach heavy‑duty rope or ratchet straps. When securing this tarp over a vehicle or equipment, wrap the strap around a sturdy anchor and tighten it to eliminate sagging. This tension helps water runoff and reduces the formation of standing water that could lead to corrosion.
For the winemana Shade Cloth, the grommets are spaced every forty inches, providing a wide spacing that is suitable for larger garden beds. Use a combination of rope and zip ties to attach the cloth to existing fence posts or trellis structures. The reinforced corners add extra strength at stress points, preventing tearing during high wind events.
Step 6: Monitor Condensation and Adjust Ventilation
After installation, observe the tarp during the first 48 hours of use. Check for water droplets forming on the interior surface, which indicates insufficient airflow. If condensation appears, increase vent size by loosening the overlap or adding additional mesh panels.
During humid summer evenings, the combination of a breathable shade cloth and a waterproof underlay works best. The breathable layer allows moisture to evaporate, while the waterproof layer prevents rain from reaching the protected items. Adjust the tension of the ropes to create a slight gap at the top, encouraging warm air to rise and exit.
In winter, the goal shifts to preventing frost accumulation. Use the GUARD SHIELD Heavy Duty Tarp as a primary barrier and add a thin layer of the Mklsit Shade Cloth on the interior side to allow limited airflow. This arrangement keeps the surface temperature above freezing while still permitting moisture to escape, reducing ice buildup.
Tips & Pro Tips
- Always clean the tarp before installation; dust and debris can block ventilation holes.
- Apply a UV‑resistant spray to extend the life of polyethylene tarps, especially in high‑sunlight regions.
- When anchoring near metal structures, place a rubber pad between the grommet and metal to prevent corrosion.
- Consider using a solar‑powered vent fan for large greenhouse installations where natural airflow is insufficient.
- Rotate the tarp seasonally; a heavier waterproof tarp in winter and a lighter mesh tarp in summer maximizes performance.
Troubleshooting
Problem: Excessive heat under the tarp during peak afternoon sun.
Solution: Increase the shade percentage by adding an additional layer of the winemana Shade Cloth, or create larger vent gaps at the top edge.
Problem: Water pooling on the interior side after rain.
Solution: Ensure the waterproof tarp is fully taut and that all seams are sealed with waterproof tape. Add a slight slope to the tarp surface if possible.
Problem: Mold developing on the underside after prolonged humidity.
Solution: Increase airflow by adding a mesh layer such as the Cool Area Mesh Shade Tarp, and clean the affected area with a mild bleach solution.
Conclusion
This guide has outlined a systematic approach to venting tarps for every season. By assessing environmental conditions, selecting the appropriate tarp, and installing ventilation channels, users can prevent condensation, mold, and heat build up. The recommended products provide reliable performance and simplify each step of the process. Implementing these strategies will extend the lifespan of tarps and protect the items they cover.
Products Mentioned in This Guide
Frequently Asked Questions
Why is ventilation important for tarps in each season?
Proper airflow prevents condensation, mold, and heat buildup, keeping the covered space comfortable and dry year‑round.
What type of tarp material is best for summer ventilation?
A lightweight shade cloth or mesh tarp allows maximum air circulation while blocking excessive sun heat.
How can I reduce condensation on a tarp during winter?
Create small gaps at the corners or use vented grommets to let moist air escape while still shielding against snow.
What accessories are needed to secure vented tarps?
Use grommet‑compatible rope, bungee cords, or zip ties with ground stakes or anchor brackets to keep the tarp taut and the vents open.
Can I use the same venting method for both gardening and camping?
Yes, the basic vent placement and tension techniques work for both; just choose a tarp material suited to the specific weather conditions.