Introduction
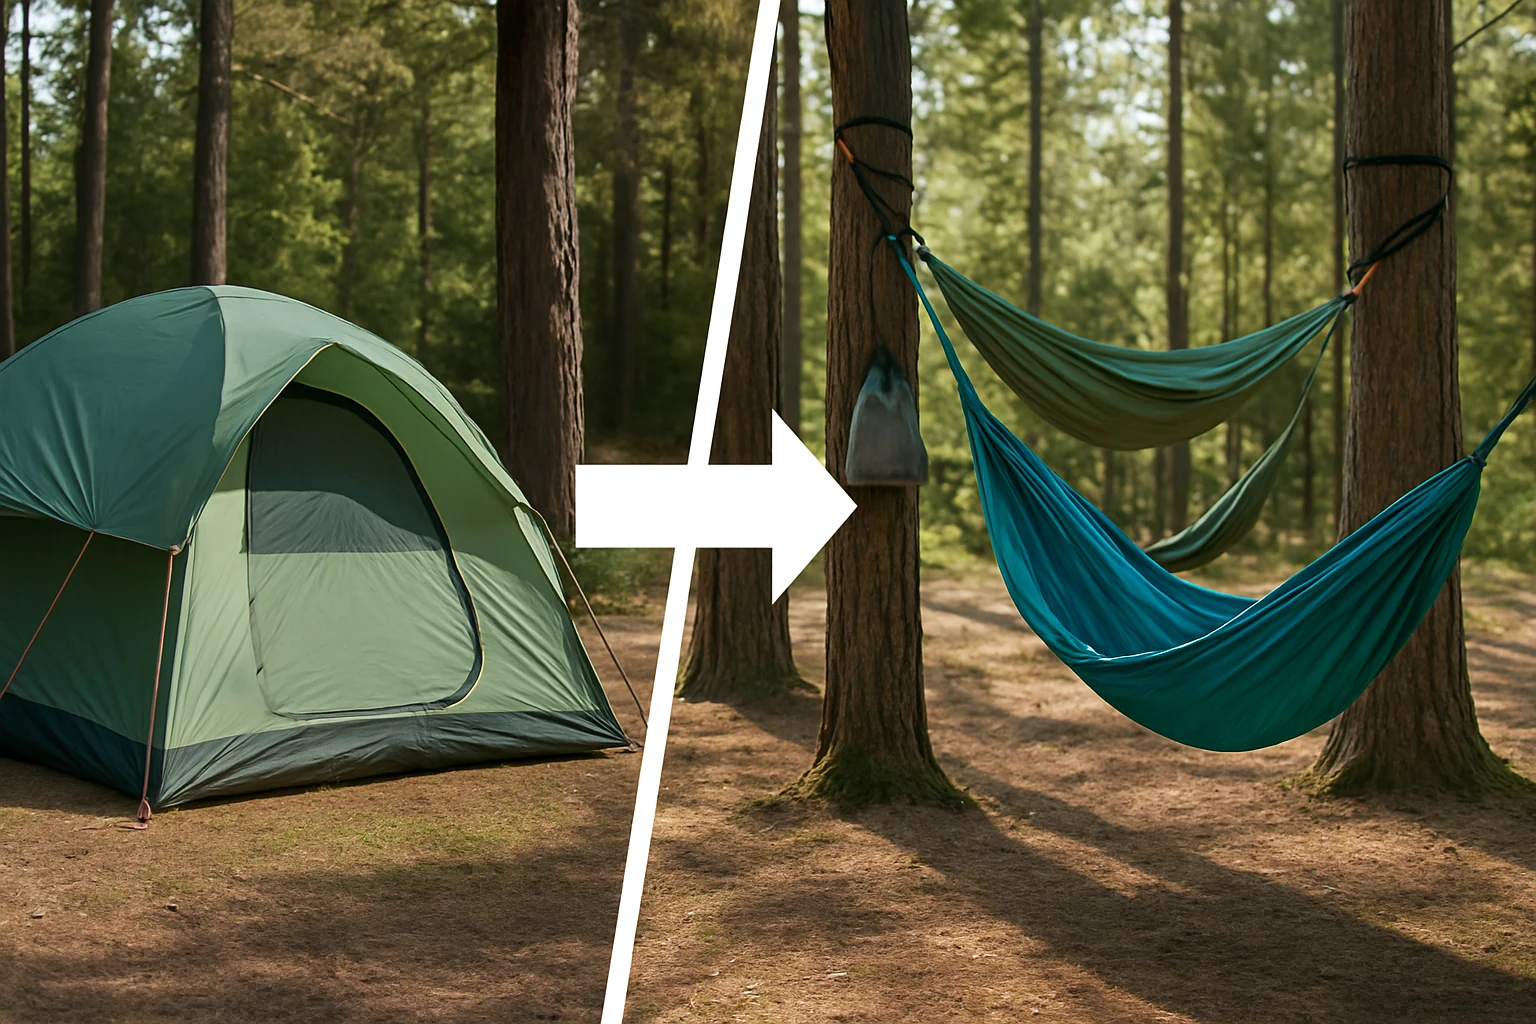
One will discover how to repurpose an existing family tent campsite into a hammock‑friendly environment that offers improved airflow, reduced ground moisture, and a novel sleeping experience. This guide explains the planning, equipment selection, and precise setup techniques required to transition safely and efficiently. By following the outlined steps, readers can enjoy the benefits of hammock camping without abandoning the comforts of a pre‑existing tent site. The information presented is valuable for both novice backpackers and seasoned outdoor enthusiasts seeking to diversify their campsite options.
What You’ll Need
- Two sturdy trees spaced 9–12 feet apart, with trunks of at least 2‑inch diameter.
- A reliable hammock suspension system (webbing, straps, or rope).
- Wise Owl Hammock Rain Fly – waterproof tarp, 11 ft × 9 ft, 18.9 oz, 4.7‑star rating.
- Aluminum tent stakes (included with the rain fly).
- Guy lines (six 10‑foot lines included with the rain fly).
- Carabiners, a small knife, and a fire starter for campsite comfort.
- Optional: a lightweight sleeping pad for added insulation.
Step‑by‑Step Instructions
Step 1: Choose a Suitable Tree Pair
First, locate two healthy trees that are roughly parallel and free of low branches that could obstruct the hammock. Measure the distance between the trunks; ideal spacing ranges from 9 to 12 feet, allowing enough slack for a comfortable sag without excessive tension. Verify that each tree can support at least 150 pounds; older or diseased trees should be avoided to prevent failure. Once the trees are confirmed, clear a small area of debris to create a level ground surface for the hammock and any additional gear.
Step 2: Install the Hammock Suspension
Attach the suspension straps or webbing around each tree trunk, positioning them at a height of 5 to 6 feet above ground for optimal airflow. Use a figure‑eight knot or a dedicated tree strap loop to distribute load evenly and protect the bark. Connect the hammock to the straps, ensuring a 30‑degree angle between the hammock line and the ground; this angle provides the best balance of comfort and safety. Adjust the length of the suspension until the hammock hangs with a gentle curve, allowing the sleeper’s hips to rest comfortably.
Step 3: Set Up the Wise Owl Hammock Rain Fly
With the hammock in place, unroll the Wise Owl Hammock Rain Fly and position it over the sleeping area. The tarp measures 11 ft by 9 ft, providing ample coverage for a single‑person hammock and a small gear shelter. Secure the four corners to the same trees using the included aluminum stakes and the six 10‑foot guy lines; attach the lines to the tarp’s reinforced grommets and tension them to create a taut, sloping roof that sheds rain efficiently. The rain fly’s ripstop nylon construction, PU coating, and 3000 mm water‑pressure rating ensure that moisture is diverted away from the sleeper, keeping the interior dry even during heavy downpours.
Step 4: Adjust Tension and Ventilation
Fine‑tune the guy lines to achieve a balance between waterproofing and airflow. Pull the lines tighter on the windward side to create a steeper angle, which improves rain shedding, while loosening the leeward side slightly to allow air to circulate and reduce condensation. The rain fly’s lightweight design (only 18.9 oz) makes adjustments quick and does not add significant weight to the pack. Verify that there are no gaps where wind could funnel rain into the hammock; a well‑tensioned tarp will act as a protective canopy without compromising breathability.
Step 5: Secure Gear and Create a Comfortable Sleeping Area
Place a compact sleeping pad or a closed‑cell foam pad inside the hammock for added insulation against cold ground air. Store small items such as a headlamp, water bottle, and snacks in the interior pocket of the rain fly or in a separate dry sack attached to the tarp’s interior loops. The rain fly’s built‑in carry bag allows the entire shelter to be packed compactly for future trips, making it an excellent addition to a pocket‑tarp kit for emergency situations. Ensure that all gear is stowed securely to prevent shifting during the night.
Step 6: Test the Setup Before Nightfall
Before settling in for sleep, perform a quick load test by gently pulling on the hammock and rain fly to confirm that all connections hold firm. Check that the tarp remains taut and that the guy lines do not slip from their knots. If the site is prone to wind, add additional tension by looping the extra guy lines around nearby branches or using additional stakes if the ground permits. A thorough test reduces the risk of unexpected failure during the night, enhancing overall safety.
Tips & Pro Tips
- Use tree straps instead of rope to avoid damaging bark and to distribute weight more evenly.
- When setting up the rain fly, orient the longer side perpendicular to the prevailing wind for optimal rain shedding.
- Consider adding a small vestibule using the excess tarp material to store boots and wet clothing.
- Apply a silicone‑based water repellent to the hammock fabric for added moisture resistance.
- In cold weather, use a down‑filled sleeping bag rated for at least 10 °F below the expected temperature.
Troubleshooting
Problem: The rain fly sags and allows water to pool.
Solution: Re‑tension the guy lines on the low side and add a secondary ridge line to create a steeper slope.
Problem: The hammock feels unstable or sways excessively.
Solution: Ensure the suspension straps are at equal height and tighten them to reduce lateral movement; adding a stabilizing line from the hammock’s center to a nearby tree can also dampen sway.
Conclusion
One has now learned how to transform a conventional family tent campsite into a versatile hammock campsite using minimal gear and sound safety practices. By selecting appropriate trees, installing a reliable suspension system, and employing the Wise Owl Hammock Rain Fly, campers can enjoy dry, comfortable sleep above the ground while preserving the original campsite layout. The guide emphasizes preparation, proper tensioning, and testing to ensure a secure and enjoyable experience. Readers are encouraged to apply these techniques on their next adventure and share their successes with fellow outdoor enthusiasts.
Products Mentioned in This Guide
Frequently Asked Questions
What tree spacing is required to set up a hammock at a former family tent site?
Trees should be 9–12 feet apart with trunks at least 2 inches in diameter for a stable suspension.
Which suspension methods work best for converting a tent campsite to a hammock?
Webbing straps, rope, or dedicated hammock suspension systems provide secure, damage‑free attachment to trees.
Is a rain fly necessary for hammock camping, and what size is recommended?
A waterproof rain fly, such as an 11 ft × 9 ft tarp, protects against moisture and adds wind resistance.
What additional gear is needed besides the hammock and rain fly?
Aluminum tent stakes, guy lines, carabiners, and a small knife are essential for anchoring and adjustments.
How does hammock camping improve airflow and reduce ground moisture compared to a tent?
Being elevated allows air to circulate underneath and keeps sleepers away from damp ground, enhancing comfort and dryness.