Introduction
Backcountry enthusiasts often rely on hammocks as lightweight sleeping systems, yet exposure to branches, rocks, and weather can cause tears, frayed suspension lines, and compromised ridgelines. This guide explains how to perform field‑expedient hammock repair using practical techniques that restore safety and comfort without extensive equipment. Readers will learn how to assess damage, select appropriate repair materials, and execute quick fixes that endure the rigors of wilderness use. Mastering these skills reduces the need for costly replacements and enhances confidence during extended expeditions.
The methods described are applicable to most hammock designs, including single‑person, double‑person, and tarp‑integrated models. While the guide recommends specific products that simplify the process, each step can be completed with generic alternatives if necessary. By following the structured approach, one can return to the trail with a fully functional hammock in a matter of minutes.
What You'll Need
- Durable cable organizer for storing repair cords and tools – GAOLAOSY Cable Organizer Bag
- Flexible PVC wire sleeves for protecting repaired lines – QZTYTY Car Wire Cover Sleeves
- Paracord or Dyneema cord (2‑mm to 4‑mm diameter)
- Silicone or urethane patch kit for fabric tears
- Scissors, a lighter, and a small multitool
- Cleaning cloth and alcohol wipes
Step‑by‑Step Instructions
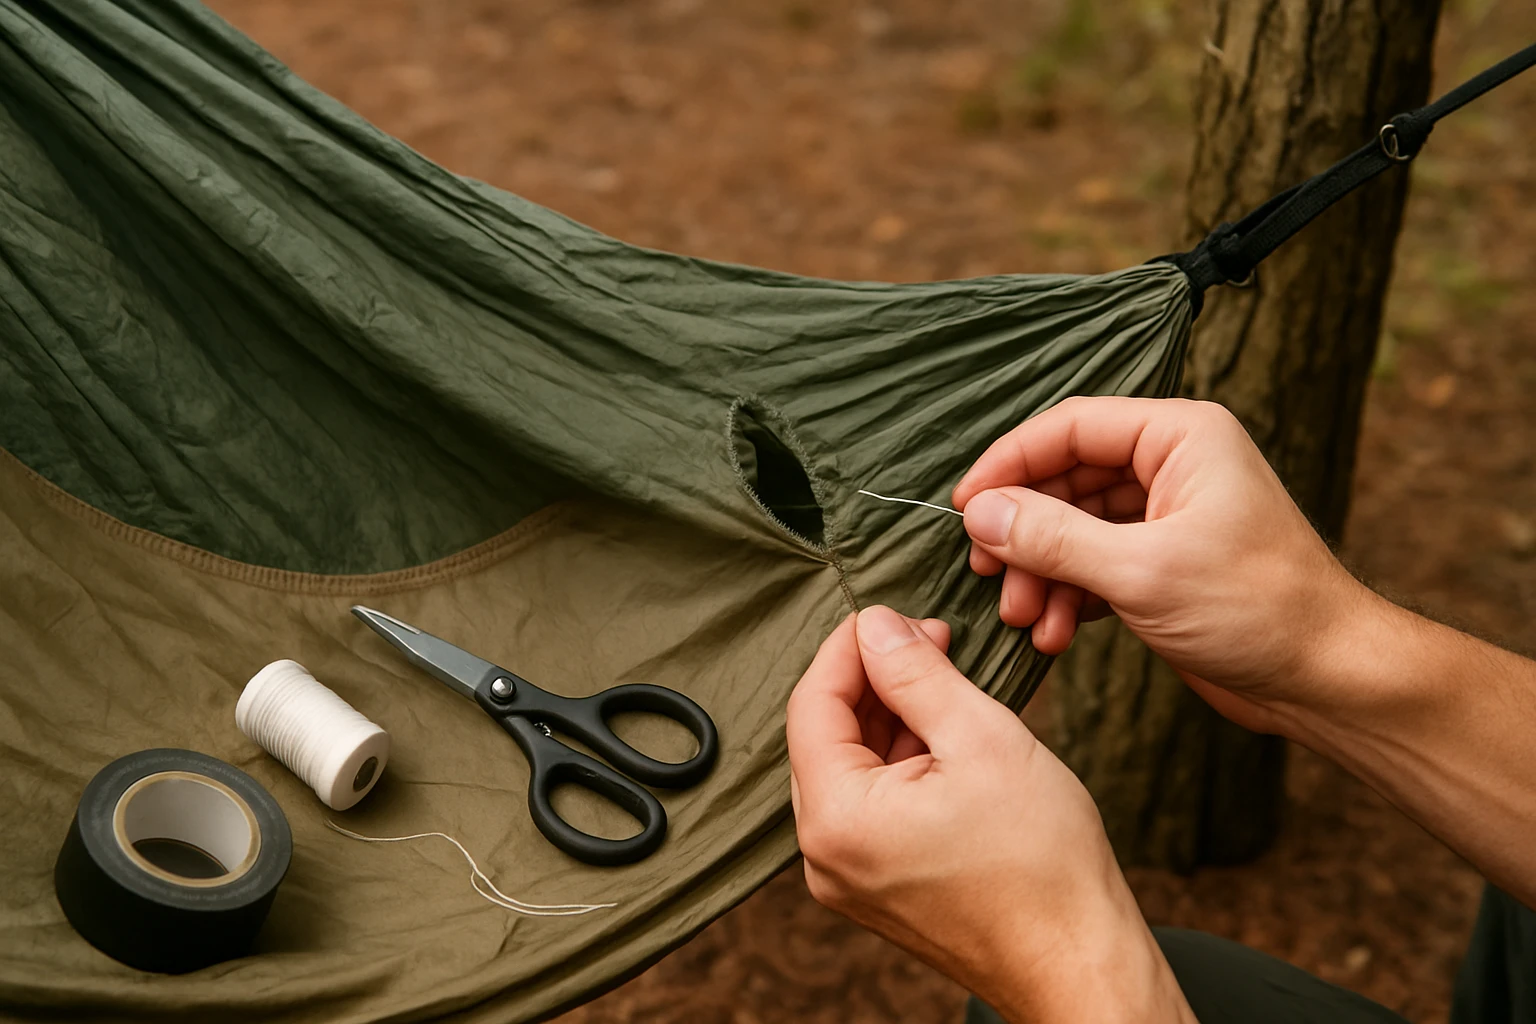
1. Assess the Damage
Before commencing any repair, one should lay the hammock flat on a clean surface and examine each component carefully. Identify torn fabric sections, inspect suspension straps for abrasion, and run a finger along the ridgeline to locate frayed fibers. Document the size of each defect, because the dimensions will dictate the amount of patch material and cord required. This systematic assessment prevents overlooking hidden weaknesses that could cause failure later.
When the inspection reveals multiple issues, prioritize repairs that affect load‑bearing capacity, such as frayed suspension lines, before addressing cosmetic fabric tears. A clear understanding of the damage also assists in selecting the appropriate size of the GAOLAOSY Cable Organizer Bag to keep repair supplies organized during the process.
2. Prepare the Repair Area
Clean the affected area with alcohol wipes to remove dirt, oils, and debris that could hinder adhesion. Allow the surface to dry completely; moisture trapped beneath a patch can cause bubbling and eventual separation. If the hammock fabric is heavily soiled, use a damp cloth followed by a dry wipe to avoid saturating the material.
While cleaning, place all cords, patches, and tools inside the GAOLAOSY Cable Organizer Bag. The bag’s 16‑inch diameter and waterproof 600D Oxford cloth protect the items from rain and dust, ensuring they remain functional throughout the repair session.
3. Repair Fabric Tears
For tears up to 2 inches, a silicone patch kit provides a flexible, waterproof seal. Cut a patch that overlaps the tear by at least 0.5 inch on each side, then apply the adhesive according to the manufacturer’s instructions. Press the patch firmly and allow the cure time to elapse before handling the hammock.
If the tear exceeds 2 inches, a fabric patch reinforced with a thin layer of paracord offers additional strength. Lay the paracord across the interior of the tear, then apply the silicone adhesive over both the fabric and cord. This hybrid repair distributes load across a broader area, reducing stress on the original fibers.
4. Replace or Reinforce Suspension Lines
Frayed or weakened suspension lines must be replaced immediately to maintain safe load limits. Cut a length of paracord that matches the original line length, adding an extra 6 inches to accommodate knots. Form a double‑figure‑eight knot at each end, then thread the new line through the hammock’s attachment points.
To protect the newly installed lines from abrasion, wrap them with QZTYTY Car Wire Cover Sleeves. These PVC sleeves are cuttable, allowing a custom fit around the cord, and their adhesive backing ensures they remain in place during movement. The sleeves resist water, heat, and wear, extending the lifespan of the suspension system.
5. Strengthen Ridgelines
The ridgeline bears the majority of the hammock’s weight, making its integrity critical. If the ridgeline shows signs of wear, reinforce it by threading a thin Dyneema cord through the existing line and tying a secure bowline knot. This technique creates a backup load path without adding significant weight.
After reinforcement, encase the combined lines with a second QZTYTY Car Wire Cover Sleeve segment. The sleeve’s waterproof and tear‑resistant properties shield the cords from environmental damage, while the double‑zipper design of the GAOLAOSY Cable Organizer Bag allows quick access to replacement segments if needed.
6. Test the Repair
Before resuming a night in the hammock, perform a load test by applying gradual weight at the center of the fabric. Observe the repaired areas for any signs of slipping, stretching, or new tears. If the hammock holds the weight comfortably for at least five minutes, the repair can be considered successful.
Should any component exhibit movement, re‑tighten knots or add additional sleeve coverage. A thorough test ensures that the hammock will not fail during a full night’s rest, preserving the safety of the user.
Tips & Pro Tips
- Carry a small roll of paracord in the GAOLAOSY Cable Organizer Bag for unexpected line failures.
- When cutting PVC sleeves, use sharp scissors to achieve a clean edge that slides over cords without snagging.
- Apply a thin layer of silicone spray to the exterior of the repaired fabric to restore water repellency.
- Store the QZTYTY Car Wire Cover Sleeves in a dry pocket; their heat‑resistant composition prevents deformation in hot climates.
Troubleshooting
Problem: Patch does not adhere to fabric.
Solution: Ensure the surface is completely dry and free of oils. Lightly sand the area with fine grit sandpaper to create a texture that improves bonding, then reapply the adhesive.
Problem: Sleeve slides off after a few hikes.
Solution: Clean the cord surface with alcohol before applying the sleeve, and press the adhesive backing firmly for at least 30 seconds. For extra security, wrap a small piece of paracord around the sleeve’s midpoint.
Conclusion
Field‑expedient hammock repair empowers outdoor enthusiasts to address tears, suspension failures, and ridgeline wear without returning to civilization. By following the systematic steps outlined, one can restore a hammock to safe, comfortable condition using a minimal set of tools. The recommended GAOLAOSY Cable Organizer Bag and QZTYTY Car Wire Cover Sleeves streamline the process, yet the techniques remain viable with generic supplies. Mastery of these repairs reduces downtime, enhances safety, and contributes to a more sustainable outdoor experience.
Products Mentioned in This Guide
Frequently Asked Questions
What are the first steps to assess damage on a hammock in the field?
Inspect the fabric, seams, and suspension lines for tears, fraying, or weakened ridgelines, then prioritize repairs that affect safety.
Which repair materials are essential for a quick hammock fix?
A durable cord (e.g., paracord), fabric patches or tape, a small needle, and a lightweight cable organizer for tools.
How can I repair a torn hammock fabric without specialized patches?
Use a strong fabric tape or a piece of ripstop nylon secured with stitching or knot‑wrapped cord to bridge the tear.
What is the best method to reinforce a frayed suspension line?
Splice the damaged section with fresh cord using a figure‑eight or double‑overhand knot, then tape the splice for added protection.
Can I use generic tools instead of the recommended cable organizer?
Yes, any small pouch or zip‑lock bag can hold cords and tools; the key is keeping them organized and accessible.