How to Prevent and Manage Tarp Condensation on Multi‑Night Trips: Essential Tips for Dry, Comfortable Camping
Introduction
Condensation on a camping tarp can turn a pleasant outdoor night into a damp and uncomfortable experience. This guide explains how to anticipate, reduce, and manage moisture buildup, ensuring that campers remain dry throughout extended stays. Readers will learn practical placement strategies, ventilation techniques, and equipment choices that work together to control humidity. By following these steps, one can enjoy the benefits of a lightweight shelter without sacrificing comfort.
What You’ll Need
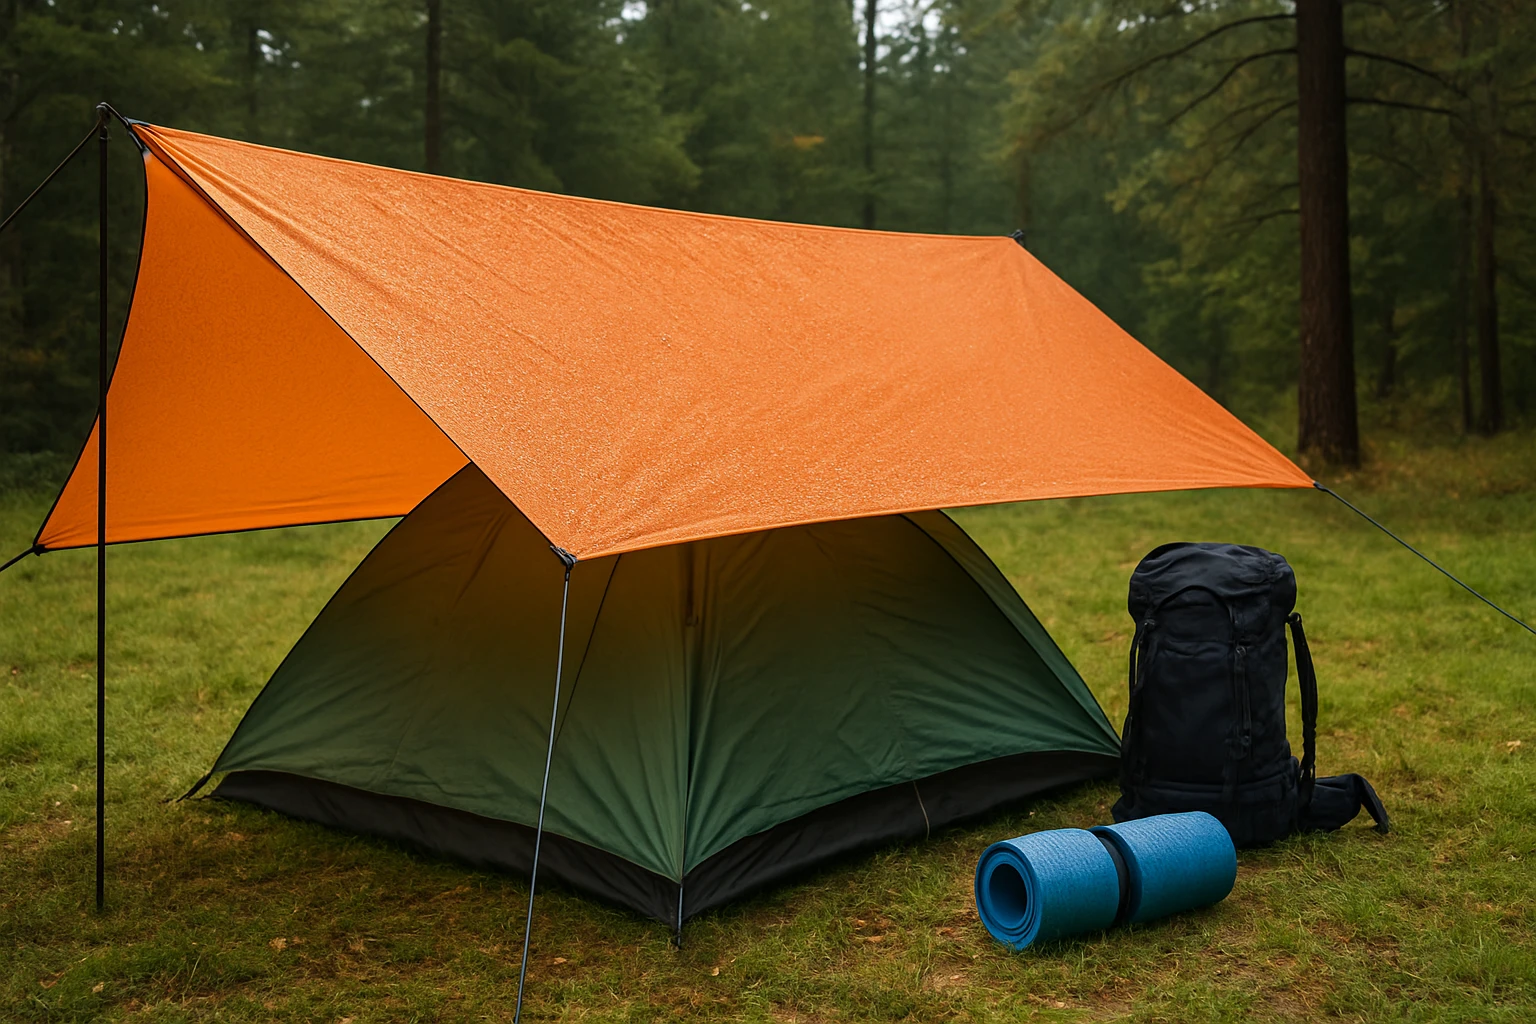
- Lightweight, waterproof tarp such as the Amazon Basics Camping Tarp (price $18.68, rating 4.6/5)
- Large, heavy‑duty tarp for extra coverage, for example the MVPNET Blue Tarp (price $39.99, rating 4.3/5)
- Ground insulation pad, rope or paracord, and grommet hooks
- Portable fan or battery‑powered ventilation device (optional)
Step 1: Select a Tarp with Appropriate Waterproof Rating
The first step is to choose a tarp that offers reliable waterproof protection while allowing some breathability. The Amazon Basics Camping Tarp features rip‑stop fabric with polyethylene lamination on both sides, providing a water‑proof barrier rated for heavy rain and snow. Its reinforced corners and grommets enable secure tie‑down, reducing sag that can trap moisture. For larger groups or vehicles, the MVPNET Blue Tarp offers a 20x30‑foot surface, 5‑mil thickness, and UV resistance, making it ideal for covering equipment that generates heat and humidity. Selecting the correct size and material establishes the foundation for condensation control.
Step 2: Position the Tarp to Promote Air Flow
After the tarp is selected, its placement determines how air circulates beneath the shelter. One should pitch the tarp with a slight slope, allowing warm air to rise and exit through the highest point while cooler air enters from lower openings. Anchor the grommets on the windward side and raise the opposite edge with a trekking pole or sturdy branch. This creates a natural chimney effect, encouraging moisture‑laden air to escape before it condenses on the interior surface. The reinforced grommets on both tarps ensure that tie‑downs remain stable even in windy conditions, preventing the tarp from flattening and sealing the airflow pathway.
Step 3: Incorporate Ventilation Openings
Deliberate ventilation openings dramatically reduce condensation. Cut small zippered vents near the top of the tarp, or simply leave the top edge unattached to the ground. For the Amazon Basics Camping Tarp, the lightweight design permits the addition of removable mesh panels that block insects while allowing moisture to escape. When using the larger MVPNET Blue Tarp, one can attach a portable battery‑powered fan at the lower edge to draw fresh air upward. These measures keep the interior environment drier than a sealed shelter.
Step 4: Use Ground Insulation to Prevent Cold Surfaces
Cold ground surfaces cause the underside of the tarp to cool, encouraging moisture in the air to condense directly on the fabric. Placing a closed‑cell foam pad or insulated groundsheet beneath the sleeping area creates a thermal barrier, keeping the tarp’s interior warmer. The insulation also reduces heat loss from the body, which in turn lowers the amount of water vapor released during respiration. When the tarp is elevated on a low‑profile frame, the gap between the ground and the tarp further improves airflow, reducing the likelihood of dew formation.
Step 5: Manage Nighttime Temperature Changes
Rapid temperature drops at night increase relative humidity, which can lead to sudden condensation. To mitigate this, one should close any interior pockets or gear that retain moisture before setting up camp. Store wet clothing in a separate waterproof bag, and keep cooking equipment away from the sleeping area. If the forecast predicts significant temperature swings, consider adding an extra layer of breathable fabric, such as a lightweight canvas liner, beneath the tarp. This secondary layer absorbs moisture and releases it gradually, preventing it from saturating the primary waterproof tarp.
Step 6: Pack and Store the Tarp Correctly After Use
Improper storage can trap residual moisture inside the tarp, causing mildew for the next trip. After dismantling the shelter, shake out any water and allow the tarp to air dry in the sun for at least thirty minutes. Fold the tarp loosely rather than tightly, and store it in a breathable dry sack rather than a sealed plastic bag. The rip‑stop construction of both recommended tarps resists mold growth, but keeping the material dry prolongs its lifespan and maintains its waterproof performance.
Tips & Pro Tips
- Use a tarp with grommets that are reinforced with metal sleeves to prevent tearing during windy nights.
- Position the tarp so that the sun hits the interior during the day; this natural heat helps evaporate any moisture that forms.
- Carry a small hygrometer to monitor humidity levels inside the shelter; when humidity exceeds 70%, increase ventilation.
- When camping in humid forests, add a thin layer of breathable fabric between the ground and the tarp to act as a moisture wick.
Troubleshooting
Problem: Persistent condensation despite ventilation.
Solution: Check that all tie‑downs are taut and that the tarp is not sagging. Add an additional support pole to increase the slope and create a stronger chimney effect.
Problem: Mold or odor after storage.
Solution: Clean the tarp with a mild soap solution, rinse thoroughly, and dry completely before folding. Store in a breathable sack to allow air circulation.
Conclusion
Effective management of tarp condensation relies on selecting the right waterproof shelter, positioning it to encourage airflow, and employing ventilation and insulation strategies. By following the six steps outlined above, campers can maintain a dry interior, enjoy comfortable sleep, and extend the life of their equipment. The recommended Amazon Basics Camping Tarp and MVPNET Blue Tarp provide reliable waterproof protection while supporting the ventilation techniques described. Implement these practices on the next multi‑night expedition and experience consistently dry, restful nights under the stars.
Products Mentioned in This Guide
Frequently Asked Questions
Why does condensation form inside a camping tarp?
Moist air from breath and sweat meets the cooler tarp surface, causing water vapor to condense like a dew point.
How can I position my tarp to reduce condensation on multi‑night trips?
Set up the tarp with one side open toward the wind and elevate the center to promote airflow and prevent warm air from pooling underneath.
What ventilation tools are most effective for managing tarp humidity?
A small battery‑powered fan or a DIY vent tube placed near the roof ridge creates continuous airflow and disperses moisture.
Do specific tarp materials help prevent condensation?
Breathable, low‑gauge nylon or polyester with a waterproof coating allows some moisture to escape while keeping rain out.
Can ground insulation pads affect tarp condensation levels?
Yes, insulating the ground reduces cold spots that cool the tarp from below, lowering the likelihood of moisture forming on the shelter floor.