How to Reduce Condensation in a Hammock Tarp: 10 Proven Tips to Stay Dry and Comfortable
Introduction
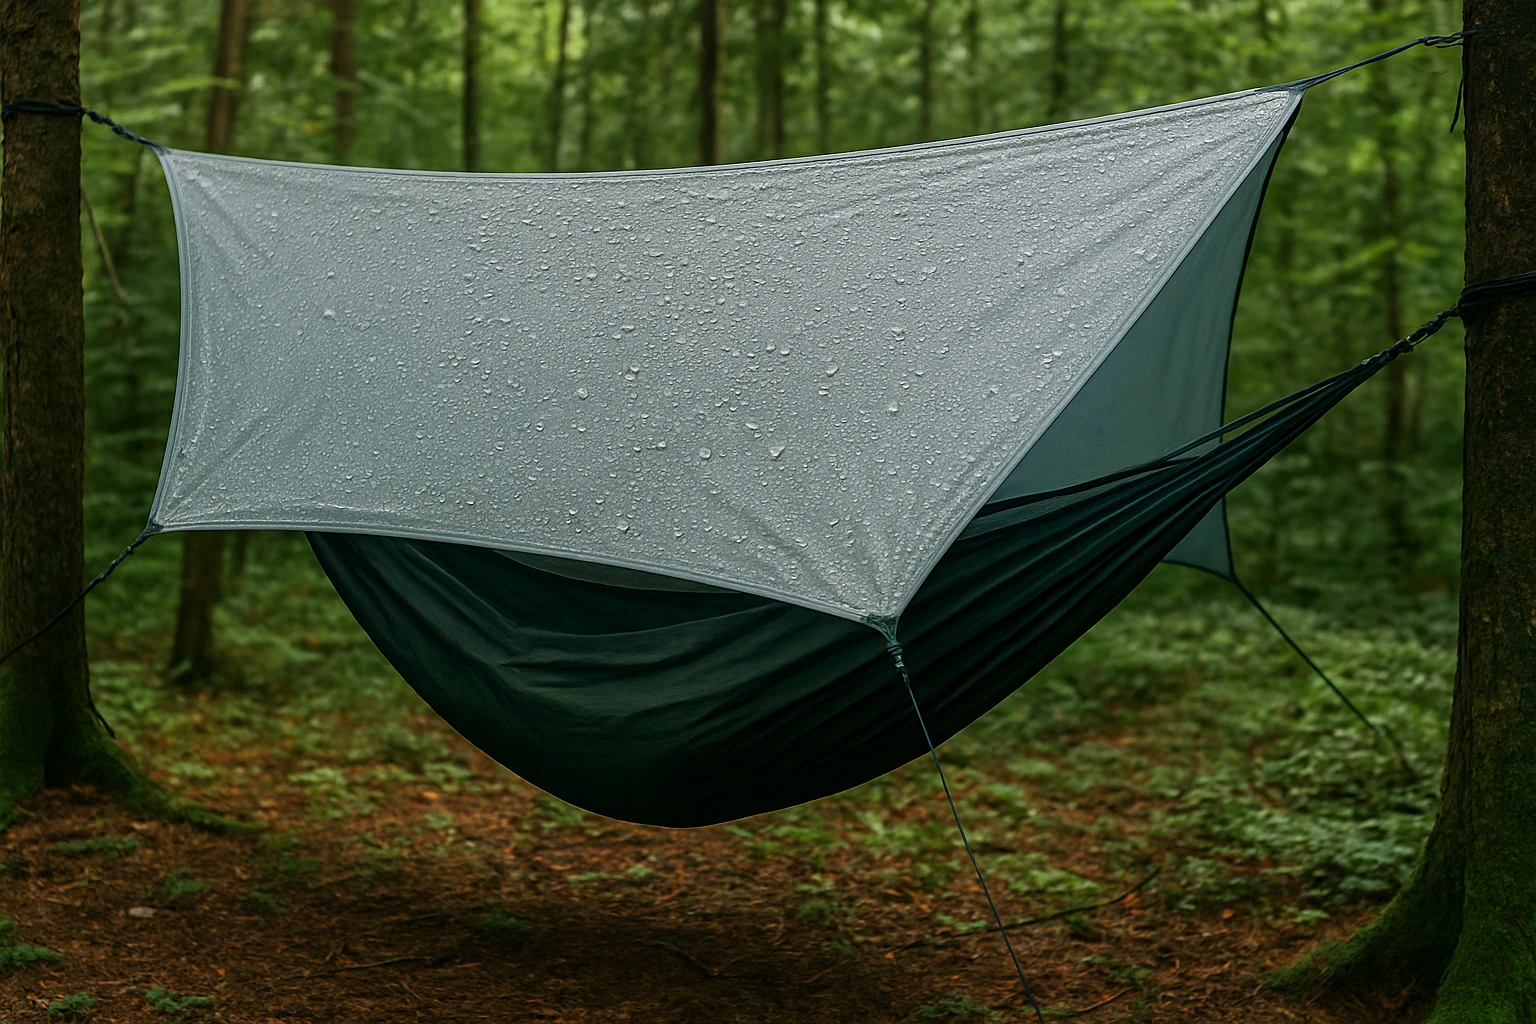
Condensation inside a hammock tarp can turn a pleasant night under the stars into a damp and uncomfortable experience. This guide explains ten proven methods to minimise moisture buildup, keep the sleeping area dry, and improve overall comfort. By following these steps, one will learn how to manage airflow, select appropriate materials, and apply practical adjustments that work in a wide range of weather conditions. The information is valuable for both casual campers and seasoned backpackers who require reliable solutions without excessive gear.
What You’ll Need
- Hammock and supporting straps or ropes
- Adjustable tarp suspension system (e.g., carabiners, cords)
- Breathable tarp such as the Bear Butt Hammock Rain Fly
- Small mesh panel or vent fabric (optional)
- Groundsheet or footprint
- Repair kit (tape, patch material)
Step 1: Choose a Breathable, Waterproof Tarp
Selecting a tarp that balances waterproof protection with breathability is the foundation of condensation control. The Bear Butt Hammock Rain Fly offers a waterproof top‑stock polyester construction that is stronger than many nylon alternatives. At a weight of just over one pound, it is ultralight and compact, making it ideal for backpacking. Priced at $24.97 and rated 4.6 out of 5 stars by 844 reviewers, it provides reliable protection while allowing limited moisture to escape, reducing the likelihood of interior fogging.
Step 2: Tension the Tarp Evenly
Proper tension creates a tight surface that discourages water droplets from collecting on the interior. Attach the tarp to the same anchor points as the hammock, using sturdy cords or carabiners. Pull the corners tight and secure the guy lines with a slight upward angle. This configuration encourages air to flow across the tarp surface, carrying away humid air before it can condense.
Step 3: Create a Ridge Line or Central Support
Installing a ridge line across the centre of the tarp forms a gentle peak that promotes natural convection. Warm air rises along the slope and exits through the highest point, while cooler air is drawn in from lower openings. Use a lightweight cord to run between two trees, then attach the tarp to the ridge line with snap hooks or loops. The ridge line adds structural stability and enhances ventilation without compromising weather protection.
Step 4: Add Ventilation Openings or Mesh Panels
Strategically placed vent holes or small mesh panels allow humid air to escape while keeping insects out. Cut two 4‑inch openings near the top corners of the tarp and line them with fine mesh fabric. Secure the mesh with waterproof tape or stitching. These vents create a controlled airflow path that reduces internal moisture without exposing the sleeper to rain.
Step 5: Position the Tarp to Harness Natural Wind
When setting up camp, orient the tarp so that prevailing winds can pass across its surface. Align the longer side of the tarp perpendicular to the wind direction, allowing fresh air to sweep under the hammock. If wind direction changes, adjust the guy lines to maintain airflow. Proper orientation works with the environment rather than against it, significantly lowering condensation risk.
Step 6: Use a Groundsheet or Footprint
Moisture from the ground can rise into the hammock space, especially during cool nights. Placing a thin, waterproof groundsheet beneath the hammock creates a barrier that blocks capillary action. Choose a material that is lightweight and easy to roll, such as a 1‑mm polyethylene sheet. The groundsheet also protects the hammock fabric from abrasion.
Step 7: Avoid Full Enclosure of the Hammock
Covering the hammock completely traps warm, moist air inside the shelter. Instead, leave a small gap at the front or side of the tarp to allow air exchange. The gap should be large enough to permit ventilation but small enough to prevent rain ingress. This simple adjustment can dramatically improve moisture management.
Step 8: Adjust Tarp Angle According to Temperature and Humidity
On colder nights, a steeper tarp angle encourages warm air to rise and escape quickly. On warm, humid evenings, a shallower angle may be preferable to reduce wind chill while still allowing some airflow. Experiment with the angle by loosening or tightening the guy lines until the desired balance is achieved.
Step 9: Incorporate a Moisture‑Wicking Inner Liner
Adding a thin, breathable liner between the hammock and the tarp can absorb sweat and release it to the outside air. Materials such as silk or specialized camping liners perform this function without adding significant weight. The liner acts as a secondary barrier, keeping the sleeper dry even if a small amount of condensation forms on the tarp interior.
Step 10: Maintain the Tarp and Repair Damage Promptly
Small tears or loose seams can allow water to seep in and increase internal humidity. Inspect the tarp before each trip, and use a repair kit to patch any damage. Keeping the tarp clean from dust and debris also preserves its breathability, as clogged surfaces hinder air movement.
Tips & Pro Tips
- Set up the tarp in a shaded area during the day to reduce temperature differentials that cause condensation at night.
- Use a small portable fan powered by a rechargeable battery to increase airflow on still nights.
- Carry a lightweight hygrometer to monitor humidity levels inside the shelter.
- When raining heavily, lower the tarp slightly to create a tighter seal; raise it again once the rain stops to restore ventilation.
Troubleshooting
Problem: Persistent fog inside the hammock despite following the steps.
Solution: Verify that all vent openings are unobstructed and that the ridge line is correctly tensioned. Consider adding an additional mesh panel or increasing the size of existing vents. If the problem continues, the tarp material may be too impermeable; a more breathable alternative could be required.
Problem: Rain enters through the ventilation gap.
Solution: Install a removable rain guard made from a thin, water‑repellent fabric that can be placed over the gap during wet conditions and removed for ventilation when the weather improves.
Conclusion
By selecting an appropriate tarp, applying correct tension, incorporating ventilation, and maintaining the shelter, one can dramatically reduce condensation and enjoy a dry, comfortable night in a hammock. The ten steps outlined in this guide provide a systematic approach that works in diverse environments. Implementing these techniques will enhance the overall camping experience and extend the usability of hammock gear for many seasons.
Products Mentioned in This Guide
Frequently Asked Questions
Why does condensation form inside a hammock tarp?
Moisture from your breath and sweat cools on the tarp’s inner surface, turning into water droplets when the air temperature drops.
How can I improve airflow to prevent condensation?
Use a tarp with built-in vents or add a mesh panel, and set up the tarp with a slight pitch to encourage air circulation.
What type of tarp material reduces condensation the most?
A breathable, waterproof fabric like a Gore‑Tex or polyester‑coated tarp lets moisture escape while keeping rain out.
Should I use a groundsheet to stop condensation?
A groundsheet blocks moisture from the ground but doesn’t affect tarp condensation; it’s useful for overall dampness control.
Can adjusting the tarp’s angle help keep the interior dry?
Yes, angling the tarp higher at the head end creates a convection current that pushes humid air out through vents.