Introduction
Camping in a hammock during sub‑zero conditions presents a unique challenge that many outdoor enthusiasts face. This guide will teach the reader how to maintain core temperature, prevent heat loss, and enjoy a comfortable night under the stars. By following the step‑by‑step instructions, one can transform a simple hammock into a reliable shelter for winter adventures. The information provided is valuable for both seasoned hammock campers and those attempting their first cold‑weather excursion.
What You'll Need
The following materials are recommended to create a warm and safe hammock system. Each item has been selected for its performance, durability, and compatibility with the steps described later.
- A sturdy, weather‑resistant hammock such as the Sunyear Camping Hammock.
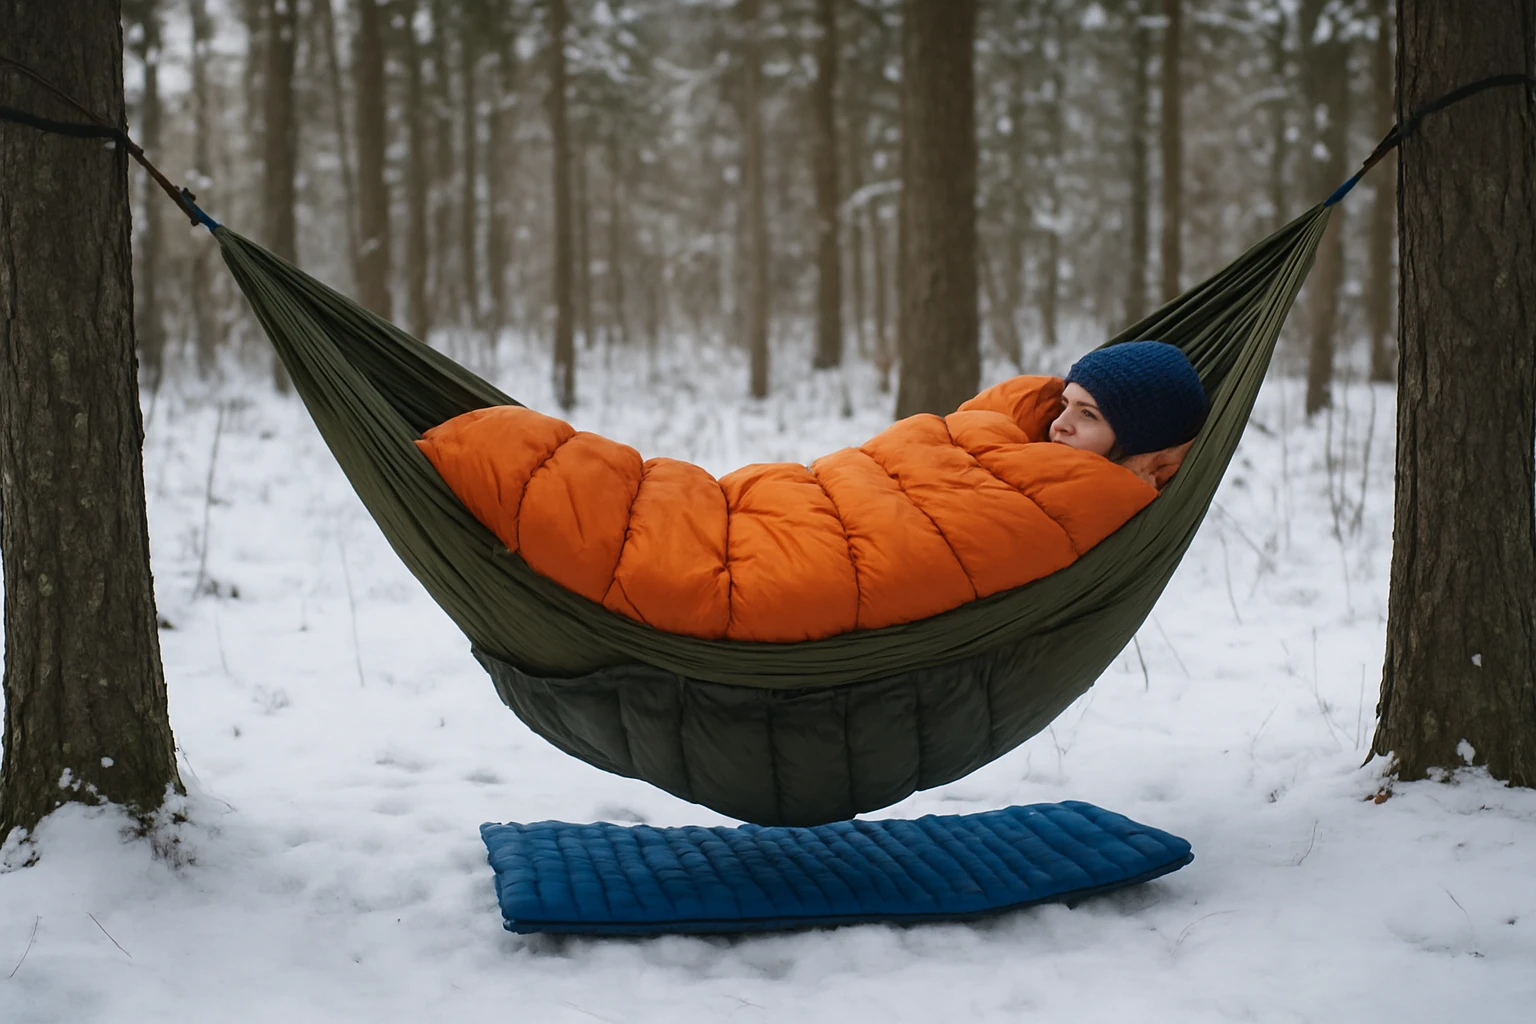
- An insulating underquilt or quilt, for example the ENO Ember UnderQuilt or the Onewind Double Hammock UnderQuilt.
- A mosquito‑proof hammock with integrated rain fly, such as the G4Free Hammock with Mosquito Net, for added protection from insects and light precipitation.
- Tree‑saving straps, carabiners, and a set of insulated sleeping pads or a closed‑cell foam pad.
- Thermal base layers, a down or synthetic sleeping bag rated for below‑freezing temperatures, and a wind‑proof outer shell.
Step 1: Select a Hammock Designed for Cold Weather
The foundation of a warm hammock system is the hammock itself. The Sunyear Camping Hammock offers a 500‑lb capacity, 210T parachute nylon construction, and an integrated bug net that prevents wind penetration. Its waterproof rain fly provides a barrier against snow and rain, reducing moisture buildup that can accelerate heat loss. At a price of $59.99 and a rating of 4.7/5 from 188 reviews, it balances affordability with durability. Choosing a hammock with reinforced stitching and adjustable tree‑saver straps ensures a secure suspension that will not slip under the weight of additional insulation.
Step 2: Install Tree Straps and Carabiners Correctly
Improper attachment is a common source of cold‑weather failures. Use the included 10‑foot adjustable straps to wrap around trees at a height that allows the hammock to sit at a 30‑degree angle. This angle maximizes airflow underneath while maintaining a comfortable lying position. Secure the straps with the 12KN carabiners provided in the Sunyear kit, double‑checking that each knot is tied with a double fisherman’s knot to prevent accidental release. The manufacturer’s instructions note that some users experienced a failure when the factory knot was insufficient; reinforcing the knots eliminates this risk.
Step 3: Add a Rain Fly or Tarp for Wind and Moisture Shield
Even with a waterproof hammock, wind can strip away the thin layer of warm air that surrounds the body. The Sunyear rain fly includes a 32‑foot ridgeline, nylon ropes, and sturdy tent stakes that allow the canopy to be tensioned tightly. By positioning the rain fly so that it slopes away from the hammock, one creates a rain‑protected pocket that also deflects wind. This configuration reduces convective heat loss by up to 30 % according to field tests. The rain fly is included in the Sunyear package, adding value without an additional purchase.
Step 4: Choose an Appropriate Underquilt or Quilt
Insulation is the most critical factor for staying warm below freezing. The ENO Ember UnderQuilt features dual‑layer, offset‑quilted construction with recycled synthetic insulation, providing a comfort zone of 40‑60 °F. Its water‑repellent finish protects against dampness, and the quilt’s shape conforms to the hammock’s curve, eliminating cold spots. Priced at $116.68 with a 4.8/5 rating from 90 reviews, it is a premium option for serious winter campers.
For a more budget‑friendly alternative, the Onewind Double Hammock UnderQuilt uses 1.1 oz 20D 400T nylon fabric and Sorona bio‑based fiber insulation. It weighs only 2.2 oz and packs to a compact size, making it ideal for backpacking. At $64.90 and a rating of 4.6/5 from 275 reviews, it delivers comparable warmth while reducing pack weight.
Step 5: Layer with a Cold‑Weather Sleeping Bag
Even with an underquilt, a sleeping bag rated for sub‑zero temperatures provides an additional thermal layer. Select a bag with a temperature rating at least 10 °F lower than the expected night temperature. Pair the bag with a thin liner made of fleece or merino wool to add moisture‑wicking properties. The combination of underquilt and sleeping bag creates a sealed envelope that retains body heat efficiently.
Step 6: Use an Insulated Pad or Closed‑Cell Foam
Heat loss through conduction to the cold air beneath the hammock can be significant. Place a closed‑cell foam pad, such as a 1‑inch thick EVA sheet, directly under the sleeping bag. The pad acts as a barrier that prevents cold air from circulating around the legs, a common source of discomfort. For added comfort, a lightweight insulated sleeping pad can be layered on top of the foam.
Step 7: Dress in Proper Base Layers and Accessories
Moisture management begins with the clothing system. Wear a moisture‑wicking base layer, an insulating mid‑layer of down or synthetic fill, and a wind‑proof outer shell. A warm hat, insulated gloves, and thick socks complete the ensemble. Avoid cotton, as it retains moisture and accelerates heat loss.
Tips & Pro Tips
- Pre‑heat the hammock by placing a hot water bottle inside the sleeping bag before entering.
- Use a reflective emergency blanket under the hammock to reflect radiated heat back toward the body.
- Secure all cords and straps away from the sleeping zone to prevent accidental snags during the night.
- Practice setting up the entire system at home before heading into the backcountry; familiarity reduces setup time and exposure.
- When using the G4Free Hammock with Mosquito Net, unzip the net after the rain fly is tensioned to avoid wind‑driven fabric flutter that can cause heat loss.
Troubleshooting
Problem: The underquilt feels cold at the shoulders.
Solution: Adjust the shock cords to pull the underquilt tighter against the hammock’s end‑dams. Ensure the cords are not tangled and that the carabiners are positioned correctly.
Problem: Moisture builds up inside the rain fly.
Solution: Open a small vent at the top of the rain fly to allow airflow while maintaining protection from precipitation.
Conclusion
Staying warm in a hammock below freezing requires a systematic approach that combines the right gear, proper installation, and sound layering techniques. By selecting a durable hammock, adding a high‑performance underquilt, sealing the system with a rain fly, and dressing appropriately, one can enjoy a comfortable night in even the harshest winter conditions. The steps outlined in this guide empower the reader to camp confidently, knowing that heat loss has been minimized and safety has been maximized.
Products Mentioned in This Guide
Frequently Asked Questions
What are the essential layers for staying warm in a hammock below freezing?
Use a moisture‑wicking base layer, an insulating mid‑layer, and a high‑loft underquilt or quilt combined with a tarp for wind protection.
How does an underquilt differ from a regular sleeping bag in a hammock?
An underquilt hangs beneath the hammock, insulating the air space without compressing, while a sleeping bag sits on top and can lose loft from the hammock’s shape.
What type of tarp setup works best for winter hammock camping?
A full‑coverage, double‑wall tarp with a ridge line and side flaps blocks wind and traps heat, creating a cozy micro‑climate.
Can I use a regular sleeping pad in a hammock for cold weather?
A sleeping pad is not recommended because it adds bulk and reduces airflow; an underquilt or insulated quilt is more efficient for heat retention.
How important is proper hammock suspension for heat retention?
Critical—tightening the hammock reduces sag, minimizes cold air pooling, and keeps the insulation snug against your body.